🌟 Introduction: The Magic of Homemade Shortcrust Pastry
Welcome to the world of baking, where the aroma of freshly baked goods fills the air and entices your taste buds. Today, we’re diving into an exquisite recipe that combines the elegance of Mary Berry’s baking with the rich, indulgent flavor of Baileys – the No Bake Baileys Cheesecake.
This dessert is not just a treat to your senses; it’s an adventure. Imagine a creamy, silky filling laced with the warm, mellow taste of Baileys Irish Cream, resting on a buttery biscuit base, sumptuous and inviting.
What makes this recipe a must-try is its simplicity. You don’t need to be a seasoned baker to achieve perfection here. With no baking involved, it’s all about mixing, setting, and enjoying. So, whether you’re looking to impress guests, make a special weekend treat, or just indulge in a little baking therapy, this cheesecake promises to deliver joy, flavor, and a touch of Mary Berry magic.
📚Understanding the Basics: Ingredients and Tools Needed
Embarking on the journey of creating the Mary Berry No Bake Baileys Cheesecake brings forth a delightful array of ingredients. Each component plays a pivotal role in crafting a dessert that’s as beautiful to look at as it is to eat. Let’s break down what you’ll need:
For the Biscuit Base:
- 300g digestive biscuits – These will form the foundation of your cheesecake, providing a crunchy, buttery base.
- 150g unsalted butter, melted – This binds the biscuit crumbs together, ensuring a firm base that holds up the creamy topping.
For the Cheesecake Filling:
- 500g cream cheese, softened – The star of the show, cream cheese gives the filling its creamy, smooth texture.
- 100g icing sugar, sifted – This adds sweetness to the filling, balancing the flavors beautifully.
- 300ml double cream – This gives the cheesecake its luxurious, rich consistency.
- 100ml Baileys Irish Cream – The Baileys brings a warm, boozy depth to the cheesecake, elevating it from delicious to divine.
- 2 tsp gelatine powder (optional) – If you prefer a firmer texture, gelatine can help set the cheesecake more solidly.
Together, these ingredients blend into a symphony of flavors and textures that make the Mary Berry No Bake Baileys Cheesecake a truly special dessert. Whether for a festive occasion or a cozy night in, this cheesecake promises to deliver comfort, luxury, and the joy of homemade baking.
Tools:
- A large bowl: Stainless steel or glass bowls are perfect for mixing our ingredients.
- A sieve: Necessary for sifting flour to avoid clumps.
- A rubber spatula: Its thin edges are perfect for the unique mixing technique we’ll be using.
That’s it! With these simple ingredients and tools, we’re ready to create a pastry that’s both delicious and versatile. Whether you’re planning a savory quiche or a sweet tart, this shortcrust pastry will be the foundation of your masterpiece. So, let’s get started and turn these basic components into an extraordinary baking experience!
🌾 Step 1: Preparing the Flour – The Sifting Process
Before we dive into the fun part, let’s ensure our flour is ready to work its magic. Sifting might seem like an extra step, but it’s the secret to a smooth, flawless pastry.
Why Sift?
- Removes any lumps or foreign objects in the flour.
- Aerates the flour, making it lighter and easier to mix with other ingredients.
- Helps in achieving a uniform texture in your shortcrust pastry.
Let’s Get Sifting!
Grab your sieve and a large bowl. Pour the measured flour into the sieve, holding it over the bowl. Gently shake or tap the sieve. Watch as a soft, fluffy mountain of flour forms underneath. This is exactly what we’re aiming for: light, airy flour that will mix beautifully with our butter and other ingredients.
If you encounter any stubborn lumps, use a spoon to gently break them apart. Repeat the process until all the flour has passed through the sieve. Remember, this step, though simple, makes a world of difference in the texture of your shortcrust pastry.
With our flour perfectly sifted, we’re ready to move on to the next step. Trust me, your pies and tarts will thank you!
🧈 Step 2: Incorporating the Butter – The Sanding Technique
Now that our flour is ready, it’s time to add the butter. This step is crucial for that flaky texture we all love in shortcrust pastry. We’re using a method called the sanding technique. It’s easy and fun!
Why Use Cold Butter?
- Keeps the pastry flaky.
- Prevents the dough from becoming greasy.
- Helps in creating those beautiful layers.
Let’s Get Sanding!
First, cut your cold butter into small cubes. Then, with clean hands, add them to the bowl of sifted flour. Now, it’s time for the fun part – sanding!
Using just the tips of your fingers, start rubbing the butter into the flour. Imagine you’re making tiny butter-flour sandcastles. Keep going until the mixture looks like a collection of fine crumbs. This texture is exactly what we’re aiming for.
Here are a few tips to make the most out of the sanding technique:
- Stay light on your fingers. Imagine you’re tickling the mixture, not squashing it.
- If you find bigger butter chunks, gently break them apart with your fingertips.
- Keep going until the mixture has a uniform, sandy texture.
This technique might take a few minutes, but it’s worth it. You’ll know you’re done when the mixture feels light and looks evenly crumbly. Now, we’re ready for the next exciting step: adding the liquid ingredients!
🥛 Step 3: Adding Liquids – Mixing Egg Yolk, Milk, Salt, and Sugar
It’s time to bring our pastry to life by adding the liquids! This step is super important because it binds all our ingredients together. Let’s mix our egg yolk, milk, salt, and sugar in the right way to ensure our pastry turns out perfect.
Ingredients to Mix:
- Egg yolk: It adds richness to our pastry.
- Milk: Brings moisture and tenderness.
- Salt: Essential for flavor, especially in savory pastries.
- Sugar: Adds a touch of sweetness for dessert pastries.
Mixing the Right Way:
First, crack your egg yolk into a small bowl. Add the milk to the egg yolk and whisk them together until they’re fully combined. This mix is going to help our pastry have that tender texture we’re aiming for. Now, depending on what you’re making, add a pinch of salt for savory dishes or a sprinkle of sugar for sweet treats. Stir everything together until the salt or sugar is dissolved.
Once your liquid mix is ready, it’s time to combine it with our sandy flour and butter mixture. Pour the liquid mix over the crumbly mixture, and start to gently fold everything together. You want to mix just until the dough starts to come together. Avoid overmixing, as we’re aiming for a tender, not tough, pastry.
This step might seem simple, but it’s crucial for creating the base of our delicious pastry. By adding these liquids, we’re one step closer to having the perfect shortcrust pastry ready for any filling you choose!
🍞 Step 4: Forming the Dough – The Hacking Method
Now that we’ve added our liquids, it’s time to transform our mixture into dough. This part is exciting because we’ll use what I like to call the “Hacking Method.” It’s easy and really effective in achieving the perfect dough texture.
Why the Hacking Method?
- Minimizes overworking the dough.
- Helps maintain the flakiness of the pastry.
- Ensures even incorporation of ingredients without creating gluten strands that would toughen the pastry.
Let’s Get Hacking!
With our liquid ingredients gently mixed into the sandy flour and butter combination, you’ll notice the mixture is a bit shaggy. That’s perfect for the hacking method. Here’s how to do it:
- Use a rubber spatula or your hands to gently fold the mixture together, just until it starts to form a rough dough.
- Transfer the dough onto a clean, lightly floured surface.
- Now, gently press and fold the dough over itself, using a bench scraper or your hands. The idea is not to knead the dough but to press it together just until it forms a cohesive mass.
- If the dough feels a bit dry, you can add a tiny bit more milk, but be careful not to make it too wet.
Once your dough has come together in a smooth ball, you’ve successfully used the hacking method! This should take no more than a few minutes. Remember, the less you work the dough, the more tender and flaky your pastry will be.
After forming the dough, it’s essential to let it rest. Wrap it in plastic wrap and chill in the refrigerator for at least an hour. This resting period allows the butter to firm up again and the gluten in the flour to relax, making your pastry easier to roll out and reducing shrinkage when baked.
And there you have it – a beautifully formed shortcrust pastry dough, ready for any filling you choose. The hacking method is a simple yet effective way to achieve the perfect base for pies, tarts, and quiches. Happy baking!
👨🍳 Step 5: The Final Knead and Shaping Your Dough
Alright, we’re in the homestretch! It’s time to give our dough the final touch before it’s ready to be transformed into a delicious pastry. This step is all about giving our dough that last bit of love through a gentle knead and shaping it to perfection.
Why Knead One Last Time?
- Ensures all ingredients are fully combined.
- Removes any air pockets that might have formed.
- Gives the dough a smooth, even texture.
Chill Again
After shaping the dough in the dish, chill it in the refrigerator for about 30 minutes. This step helps prevent the pastry from shrinking or losing its shape when you bake it.
Whether you’re making a tart, pie, or quiche, shaping your Mary Berry shortcrust pastry properly ensures a perfect base for your fillings. Remember, practice makes perfect. Don’t worry if it doesn’t come out right the first time. The more you work with pastry, the better you’ll become.
Shaping Your Masterpiece
After our dough has rested and is chilled, lightly flour your work surface and place your dough on it. Now, gently knead it for just a minute. Remember, we’re not trying to work the dough too much; just enough to make it pliable and smooth.
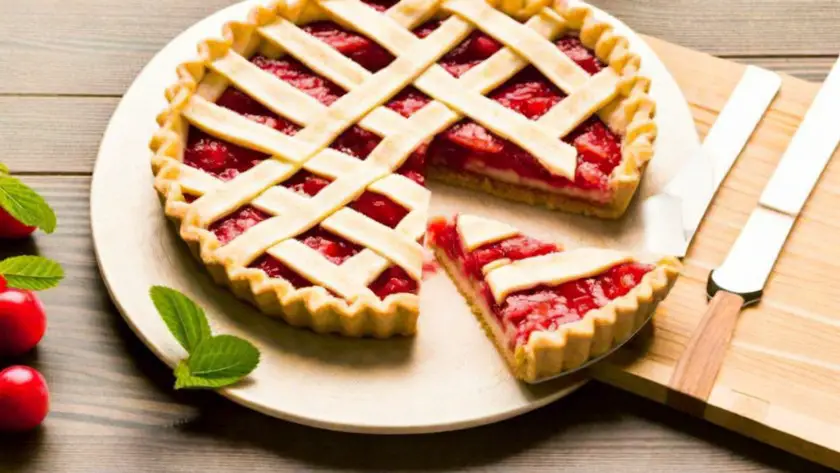
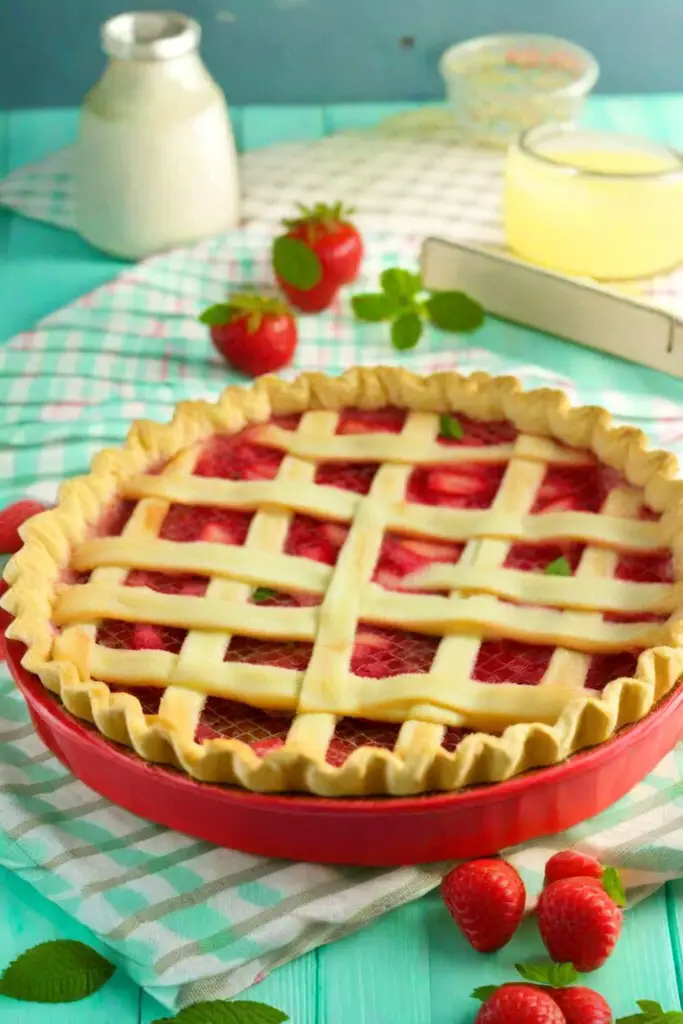
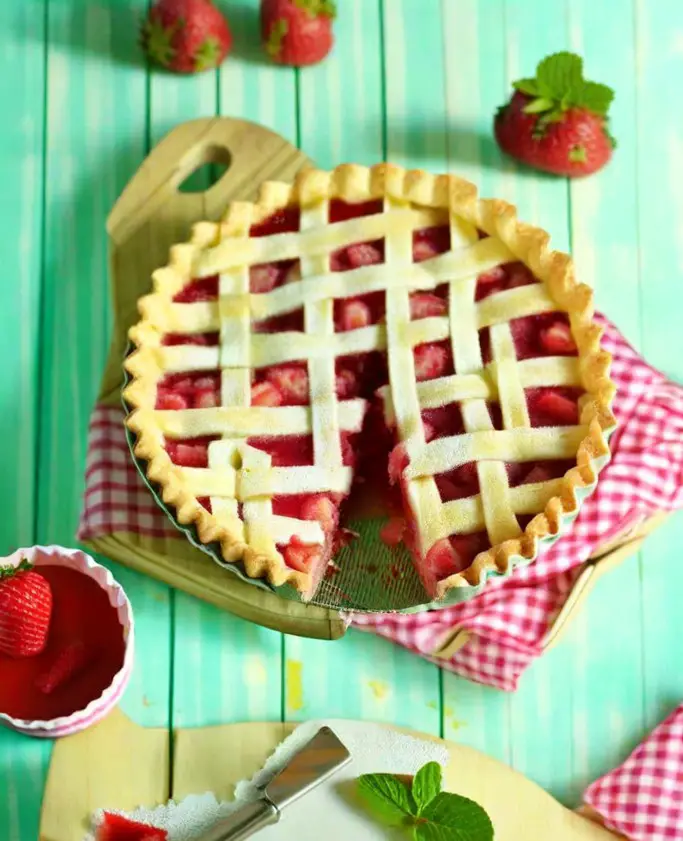
Next, it’s time to shape your dough according to your recipe. Whether it’s a pie, tart, or quiche, roll out your dough to fit your dish. Aim for an even thickness throughout to ensure consistent baking. If you’re making a tart or a pie, gently press the dough into your dish, making sure it’s snugly fitted. Trim any excess dough from the edges, and voila! Your dough is shaped and ready for its filling.
Final shaping is a crucial step in the pastry-making process. It’s your opportunity to give your dough the perfect form it needs to hold your delicious fillings. Take your time, and don’t rush this part. With a little patience and care, you’ll have a beautifully shaped pastry that’s ready to impress.
💗 Reasons To Add This Recipe To Your Repertoire
Adding the Mary Berry shortcrust pastry recipe to your baking collection has many perks. Here’s why you should consider mastering this gem:
- It’s versatile. This pastry can be the base for both sweet and savory dishes, from pies to quiches.
- It’s easy. Even if you’re new to baking, this recipe is straightforward and forgiving.
- It elevates your baking. Imagine serving a homemade pie with a flaky, buttery crust. Your friends and family will be impressed!
- It’s a skill builder. Mastering shortcrust pastry teaches you the basics of baking, which you can apply to other recipes.
- It’s fun! There’s something deeply satisfying about rolling out dough and crafting a beautiful pastry from scratch.
Whether you’re baking for a special occasion or just a weekend treat, having this recipe in your toolkit makes the experience more enjoyable and delicious.
🍒 What To Serve With Mary Berry Shortcrust Pastry
Wondering what to pair with your Mary Berry shortcrust pastry creations? Here are some delightful ideas:
- For sweet pies or tarts, a scoop of vanilla ice cream or a dollop of whipped cream adds creaminess.
- A tangy lemon curd or raspberry coulis can cut through the richness of dessert pastries.
- When serving savory dishes, a fresh green salad with a vinaigrette compliments quiches and meat pies perfectly.
- For a cheese tart, try a side of marinated olives and sun-dried tomatoes to enhance the flavors.
- A piping hot cup of tea or a cold glass of wine can be the perfect beverage pairing, depending on the time of day and the filling of your pastry.
These pairings will help create a balanced and enjoyable meal, showcasing your baking skills and elevating the overall dining experience.
❓ FAQs
Got questions about Mary Berry’s No Bake Baileys Cheesecake? You’re not alone! Here are some frequently asked questions that might help you on your baking journey.
How Do I Prevent My Cheesecake From Cracking?
To prevent cracking, make sure all your ingredients are at room temperature before starting. Also, avoid overmixing the batter, as it can incorporate too much air, leading to cracks. Lastly, chill your cheesecake gradually to avoid sudden temperature changes.
What Soft Cheese Is Best For Cheesecake?
Full-fat cream cheese is the best option for achieving that creamy, rich cheesecake texture. It blends well and gives the cheesecake its classic flavor and consistency.
Can I Use A Different Type Of Alcohol Instead Of Baileys In The Recipe?
Absolutely! While Baileys gives a unique flavor, you can experiment with other creamy liqueurs or even a different type of alcohol like rum or bourbon. Just keep the quantity the same to maintain the recipe’s balance.
How Do I Achieve A Smooth Texture In The Cheesecake Filling?
Ensure your cream cheese is soft and at room temperature. Beat the cream cheese separately until smooth before gradually adding the other ingredients. If there are lumps, gently warm the mixture over a water bath while stirring until smooth.
Remember, baking is all about experimenting and having fun. Don’t worry if things don’t come out perfect the first time. Happy baking!


